A beautiful product image is equivalent to 1,000 website visitors if a picture is worth a thousand words. The strategy for your e-commerce website can benefit greatly from product photography, even if I don’t have any evidence to support that claim (yet).
You must also provide your audience with clear, captivating images of your items if you want to reach the people of your target audience who like to shop online.
But taking pictures of products requires more than just pointing and shooting. For even, the most simple items to generate stunning photographs that draw customers to the buy page, the appropriate tools, lighting, and environment are required.
6 Product Photography Tips
Here are some pointers, samples, and resources to help you sell and photograph your items in a way that will compel visitors and potential customers to convert.
1. Don’t Be Afraid To Use Your Smartphone’s Camera
I’m meant to persuade you to buy a pricey, 50-megapixel (MP) camera with a 100-millimeter screw-on lens at this point. But I won’t take that action.
Utilize the camera you currently have if it fulfills this criterion. However, taking product shots with a smartphone is perfectly fine for many different kinds of things.
Modern smartphones have strong cameras with settings that let you adjust your images for various lighting conditions and shooting scenarios.
2. Shoot From A Tripod For Photo Consistency
I have to start by outlining a cardinal rule before discussing tripods: Never lean your phone against a solid surface to direct your camera’s lens toward the subject.
It’s just too simple for this improvised arrangement to move about throughout the session, resulting in inconsistent appearances in your images. Make sure that the position of your camera, if you want to place it on anything like a stack of books, does not vary during the shooting.
Taking a few product shots for your e-commerce website while holding the camera yourself is quite acceptable. However, if your company expands and you photograph additional things, it may become challenging to standardize the product’s orientation in each handheld shot.
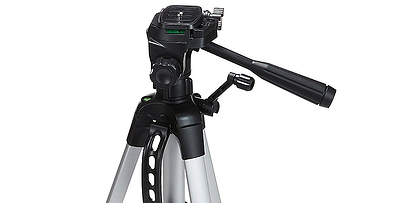
You’ll need a tripod to maintain uniformity among your items. And fortunately, purchasing one isn’t necessarily the significant outlay that it formerly was.
Here are two tripod models to think about.
Traditional Vs Flexible
There are conventional tripods for both cameras and cellphones in addition to this one.
There are several ways to operate a flexible tripod. To get the desired angle, you may bend its legs and set them on various surfaces.
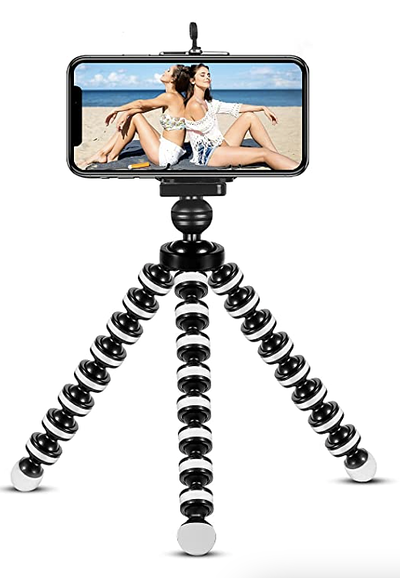
Mobile Grip
Frequently, your tripod’s top has a screw that connects to your camera and holds it steady. Smartphones can use the adapter shown below, but most professional-grade cameras include a screw hole on the bottom specifically for this reason.
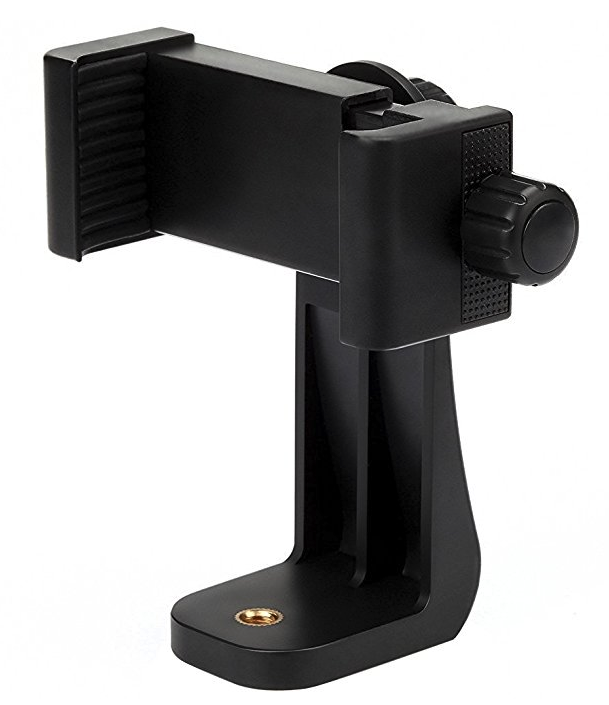
You can use the camera controls with the phone screen facing outward and toward you thanks to an adaptor that holds the edges of your smartphone and screws into any type of tripod.
Once you’ve decided which mount you’ll require, set it up in front of your product and think about marking the ground with three pieces of tape where you want to keep each tripod leg throughout the shoot.
3. Choose Natural Light or Artificial Light
Never undervalue how particular lighting may help (or hurt) your product photography. Keep in mind that shoppers can examine whatever they ought to see before making a purchase greatest in person. When all website visitors have to rely on is a photo, the proper lighting setup enables you to highlight those crucial product qualities that influence purchasing decisions.
Not every product will respond well to the same lighting situation; in fact, some items may seem worse with certain lighting configurations.
You have the option of using either natural or artificial light as your primary source of illumination.
Natural Light
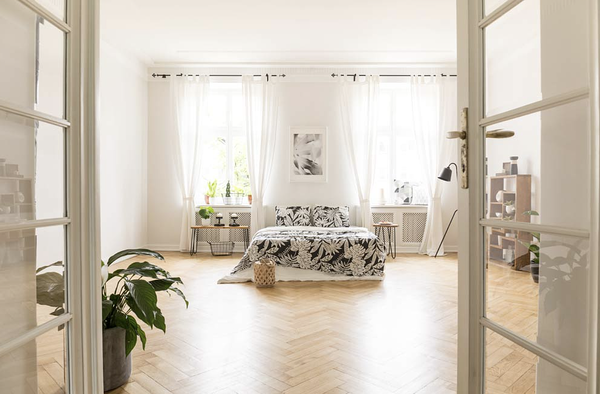
Simply put, “natural light” refers to sunshine. Because the sun throws a wider, softer range of light than, for example, a bulb shining directly on the goods, it is sometimes referred to as “soft light.” Natural light is ideal for e-commerce product photography if
- The product was either created for outdoor usage or was photographed there.
- The individual uses wears or uses the thing while shooting it (people tend to look better in natural light).
- Instead of focusing on a single feature of the product, you’re attempting to draw attention to its surroundings.
A photograph that was taken in natural light is shown here:
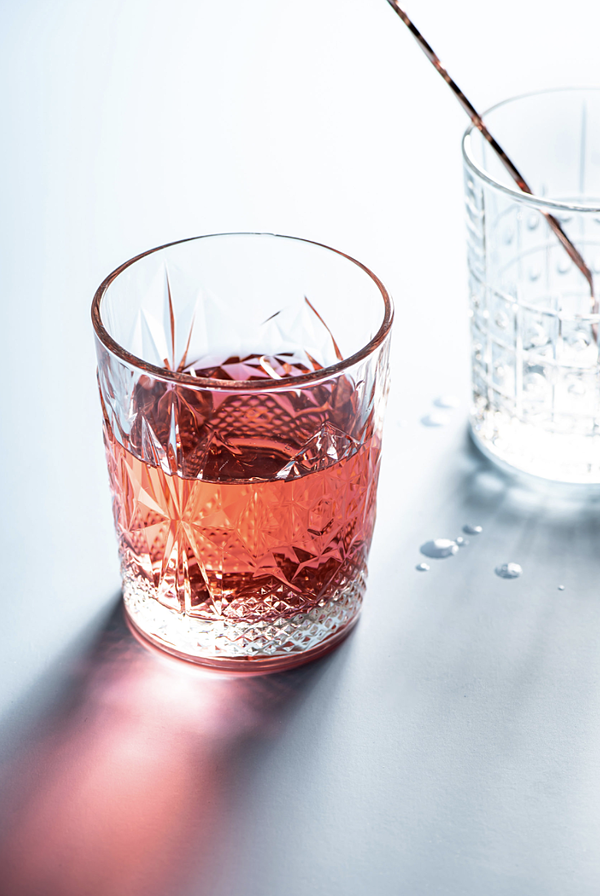
Artificial Light
Candles, fire, and light bulbs are examples of artificial lighting. Because it creates a smaller, more concentrated light surface, it is also known as “hard light.” Products with physical details that need to be emphasized to wow an online customer are catered to by this style of illumination.
Here’s an example of artificial light being used to shoot:
As a general guideline, limit the amount of natural or artificial light in each photograph. A product that is intended to seem sharp can be softened by adding natural light to an artificially lit shot, and a product that is intended to look soft may be sharpened by adding artificial light to a naturally lit photo. Avoid putting obstacles in your path.
4. To Soften Shadows, Bounce, or Fill Your Light
You must reduce the shadows that any prospective harsh light casts on a product’s opposite end, whether you employ natural light or artificial light.
There are Three Ways To Do This:
Fill Light
Include a second, less powerful light source in addition to your primary one. Your fill light, also known as an auxiliary source of light, is employed as a counterweight to lessen the shadow your primary light naturally casts behind an object.
To do this, position your fill light across from your main light such that your product is positioned between the two lights.
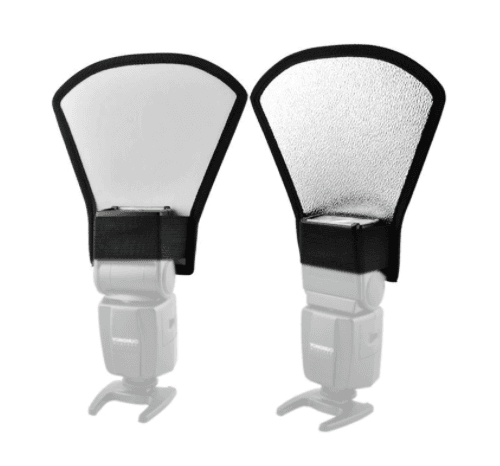
Flashbulb Bounce Card
A bounce card, also known as a reflector card, is a little card that “bounces” or “reflects” the primary light back into the area directly beneath your product to minimize shadows.
To disperse the light from the camera’s flash, some bounce cards are attached to the flashbulb of a professional camera lens. To prevent lengthy shadows from trailing behind the topic you are photographing, this card throws a softer light onto the subject from above your set rather than directly at it.
Both the white (left) and foil (right) varieties of this item, as seen below, are capable of diffusing the flash.
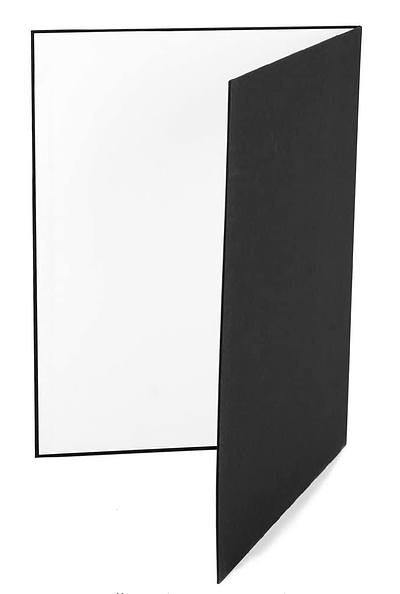
Standalone Bounce Card
A flashbulb bounce card is not an option if you’re shooting from a smartphone because you lack a real flash to which you can attach it. Instead, create your independent bounce card and place it in opposition to your primary light source.
This bounce card may successfully replace your fill light for novices to product photography, which offsets the harsh light from the camera flash or lamp that is facing toward the front of your object
5. To Highlight The Product, Use A Sweep or Portrait Mode
Your merchandise, lighting, and bounce cards shouldn’t all be placed in the same spot because their placement might vary greatly based on your background. But don’t choose a background based on what would be easiest to create. The image that you want online buyers to have of your products should be reflected in the background.
First, decide if you like a white backdrop or a more dynamic, natural background. Each one can be accomplished easily.
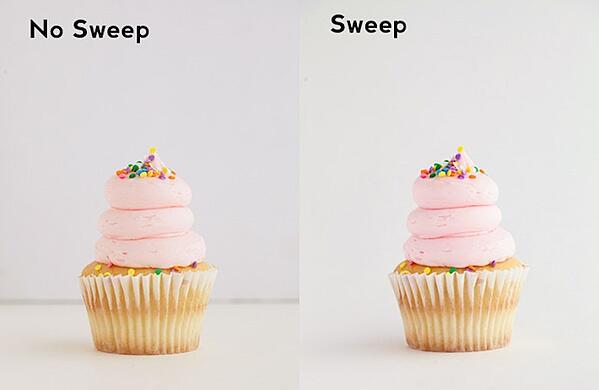
White Background: Sweep
It’s more difficult to set up a table against white drywall for white backdrops. Even smartphone cameras may pick even tiny flaws on a white wall that the human eye would overlook. Use a sweep to capture a flawless white backdrop without any edges or flaws.
A sweep is a large, flexible piece of paper that bends up to form a white wall behind your object and functions as the surface behind it.
The sweep’s curvature is concealed on camera, accentuating important product characteristics and allowing the item to command a website visitor’s whole attention.
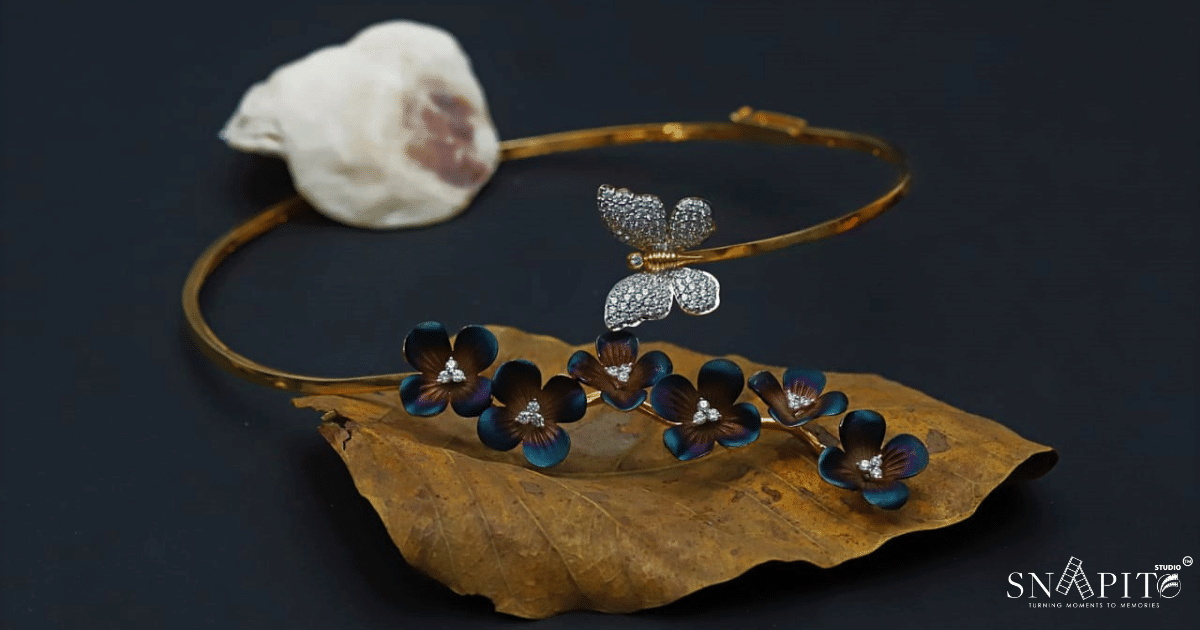
Here is a side-by-side comparison demonstrating the importance of a sweep:
Real-World Background: Portrait Mode
As you can see in the image of the suitcase earlier in this article, dynamic, real-world backdrops are highly appealing when photographing objects that have a specific application or are being modeled by a person.
However, it’s simple for a background from the real world to take over the image’s focal point and obscure the object that you’re trying to sell.
Portrait mode, a photo option on most professional cameras and now accessible on many modern smartphones will give your product depth and attention. By blurring the backdrop, this option makes the product’s context visible without detracting from it.
6. Shoot A Variety of Images
The last piece of advice I have for you is to take more than one shot of each product. Your website should capture a range of photographs to mimic how shoppers might look at, touch, use, and even test products in a physical store.
When photographing apparel, for instance, take pictures of the item both alone (spread out on a white surface) and on a mannequin whose color contrasts the item.
Then, to get more shots, have a model wear the clothing so you can take pictures of it from all of the model’s different angles.
Product Photography Set-Up
Let’s now review the information we just learned. Below is a list of fast advice for setting up product photography that you may distribute to your team:
- Choose a camera, whether or not that requires utilizing a smartphone.
- Purchase a tripod that is suitable for your chosen camera.
- Choose between natural and artificial lighting; consider which is ideal for your product and the surrounding area.
- Choose between filling and bouncing the light.
- Choose between sweep and portrait modes.
- To provide your visitors with diversity, take several different pictures.