
One of the finest things you can do with a camera is to explore the countless creative possibilities of landscape photography, but how can you be sure you’re getting the appropriate exposure when you’re working with challenging lighting? Fortunately, you can utilize the histogram on your camera to assist you in capturing an adequately exposed scene.
The topic of exposure may be quite challenging. There are a variety of metering options available on many DSLRs and mirrorless cameras, such as matrix, center-weighted, and spot metering, in addition to the complicated concepts of exposure compensation and exposure lock. However, there is a far easier approach to achieving ideal exposure! It mixes traditional manual vulnerability with the histogram display, a marvel of contemporary digital imaging.
It’s easy. You snap a photo, view the image histogram in playback mode, make any necessary adjustments to the parameters, then take another picture.
The histogram is essentially a bar chart that displays the brightness distribution of the pixels in your image, from completely dark on the far left to completely white on the far right. Press up or down on the multi-selector on the camera’s rear to switch the display mode if you don’t immediately see the histogram display.
The histogram’s whole shape, or the ‘optimal’ exposure, falls between the two extremes and encompasses all of the image’s tones. Your camera’s histogram is still the most precise and dependable technique to achieve the ideal exposure, even if you probably won’t get it just right on your first try, and many topics are extremely challenging.
This method isn’t appropriate for all types of photography (there isn’t enough time for it with sports), but it works well for landscape photography. You have enough time to mount the camera on a tripod, carefully examine the outcomes, and make those minor but crucial modifications.
1. Keep It Steady
Use a tripod since even a little change in framing can alter the histogram’s form and make it more difficult to determine what modifications are necessary. Additionally, tripods urge you to carefully consider the composition and take your time to achieve the ideal photo.
2. Switch To Manual

Adjusting the exposure is simple when using the manual mode to modify the lens aperture or shutter speed. You could accomplish this in any of the auto modes, but you would then have to change the exposure using the exposure compensation slider, and you wouldn’t be as familiar with the basic camera settings.
3. Use The Sunny 16 Rule
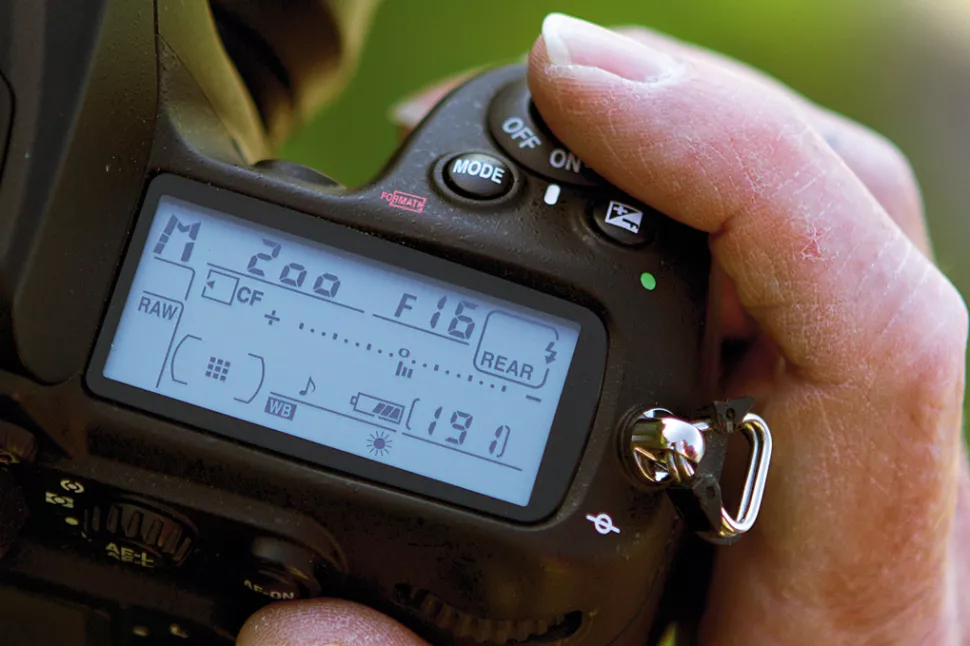
Try to estimate the proper exposure! We still adhere to the “sunny 16” criterion. According to this, you should set the shutter speed to the ISO setting and the aperture to f/16 in strong light. Our exposure is 1/200 sec at f/16 since our camera is set at ISO200. An estimation is acceptable because this is only the beginning.
4. Check The Histogram

Take a snapshot, then examine the image’s histogram on the LCD screen. Your photo is underexposed if it is over to the left and doesn’t reach the right side. The picture is overexposed and the highlights are “clipped” if it is so far to the right that it is cut off at the edge.
5. Achieve The Perfect Exposure

The histogram must fit entirely within the scale for the exposure to be considered ideal. You may usually do this by carefully adjusting the camera’s exposure settings. Our scene’s histogram simply fits within the histogram scale with the proper exposure.
6. Histogram Too Wide?

The histogram no longer fits once we shifted to incorporate more of the shaded side of the cliff in our photo, regardless of the exposure settings we use. In other words, the scene has more “dynamic range” (brightness range) than our camera can record. What then do we do?
7. Go For A Grad
Landscape photographers frequently encounter this issue, but there is a straightforward fix: apply a graduated filter. The sky becomes darker as a result, but the terrain remains unchanged. The trick is to place the graduation on or just above the horizon and select a filter with the proper intensity.
8. Histogram Just Fits
In our initial effort, the sky was overexposed and the shadows in the cliff face were filled in. We have been able to bring that bright sky back into the dynamic range of the camera’s sensor by using the graduated filter to slightly raise the exposure for the shadows.