As a wedding photographer, you might not always have the opportunity to take pictures in settings with stunning beaches or mountains adding to the “wow” element of your images. You could have to take interior photos because of the weather or because your couples prefer indoor locations. It’s possible that you’ll have to capture the ceremony inside a church or some other sort of location, even at weddings when you do get to take photos outside. In addition, interior sites can occasionally be tiny, gloomy, or perhaps both, which can offer a special touch to wedding photographs. This does not exclude you from taking beautiful pictures in these circumstances, either. It all comes down to having some photographic tips and tricks at the ready! This blog provides you with 10-pointers on how to up your indoor wedding photography game even in less-than-ideal situations, from discovering natural light sources to creating gorgeous silhouettes.
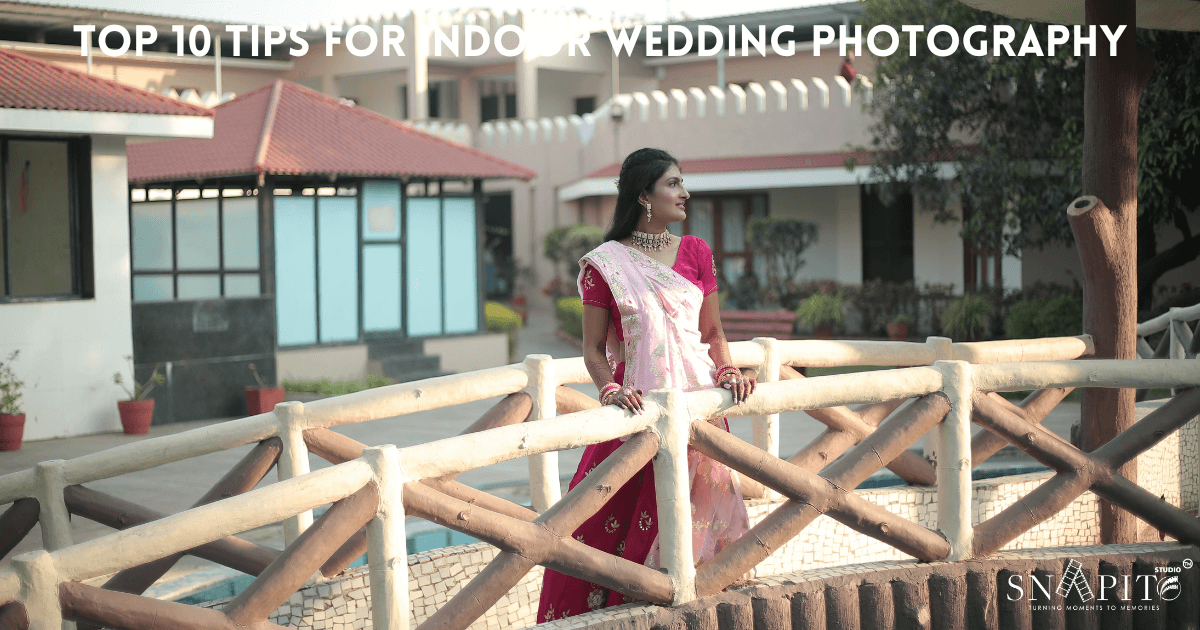
Tips To Help You Ace Indoor Wedding Photography
1. Shoot Raw
Try shooting RAW as our first piece of advice to up your indoor wedding photography game. And while shooting RAW could need more time in post-production, you must remember that RAW files allow you greater editing versatility when editing wedding images. Shooting in RAW may provide you the ability to afterward significantly improve your images if you are working in dim settings.
2. High Iso + Black & White = Amazing
You may get better ambient light capture for indoor wedding photos by raising your camera’s ISO. Yet, it could make an image noisy or grainier. Such noisy, grainy shots may be transformed into timelessly beautiful images by post-processing them to black and white. Try shooting in black and white or post-processing your wedding images to make them black and white to see how the beauty of black and white photography can also bring out emotions and emphasize candid moments in a more photojournalistic way.
3. Embrace Moody Lighting
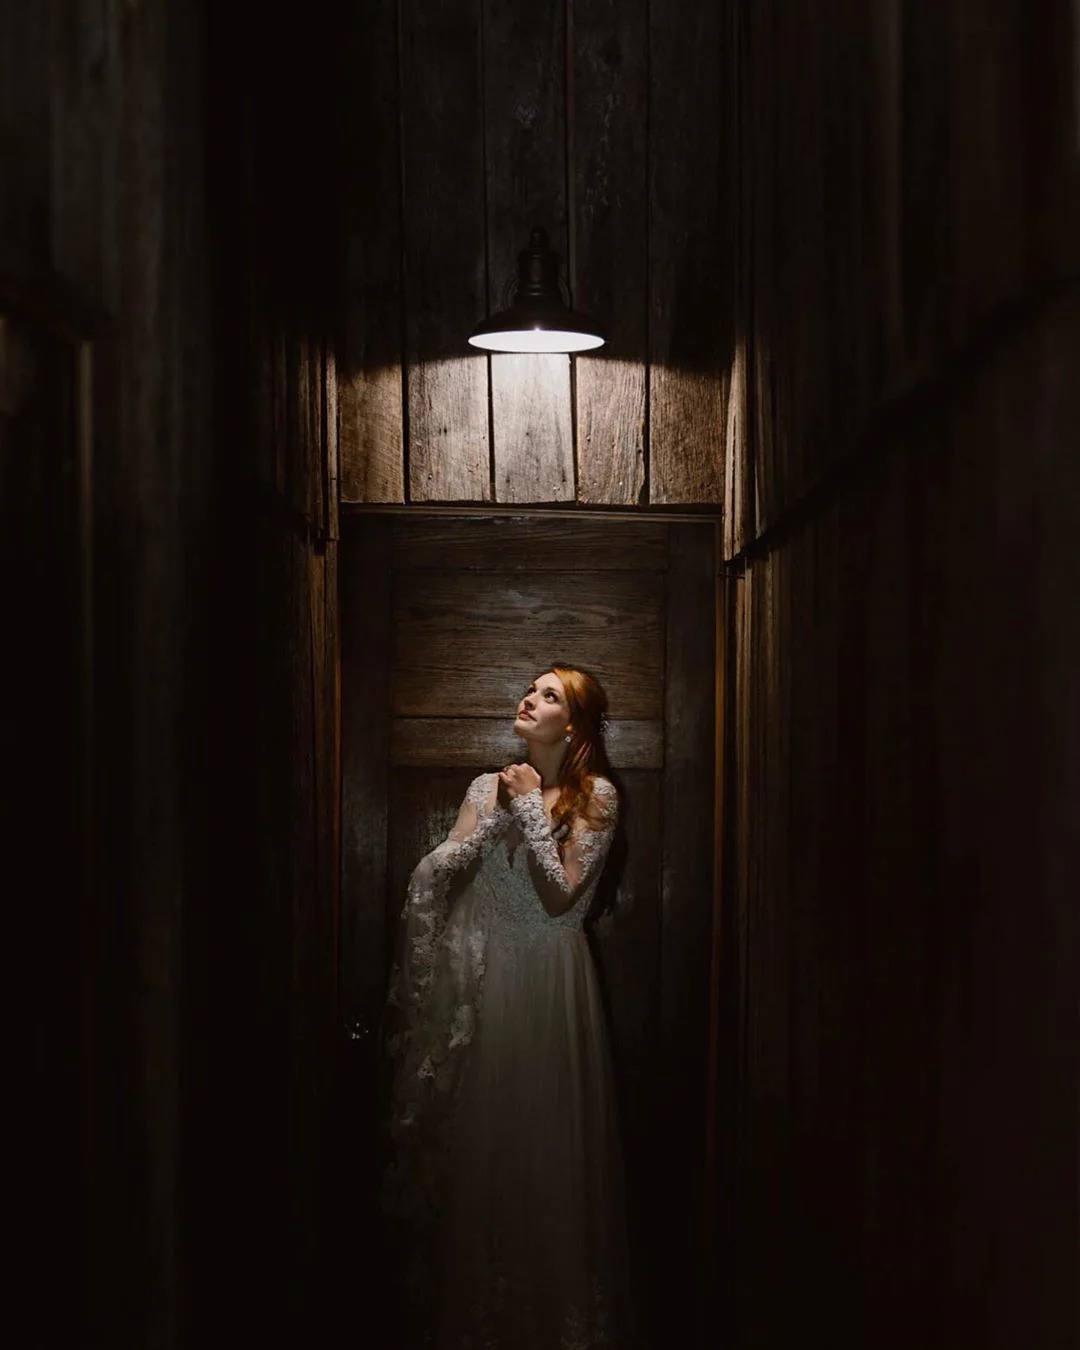
Most venues have moody lighting, even if they are small and gloomy ones! Look around for any accessible light sources, such as a chandelier, wall sconces, or ceiling lighting. When employing off-camera lighting, consider using the off-camera flash to create a backlight behind the subject or locate a direct light source at the location and position it behind the subject. While working in this type of lighting, your subject’s face may either be partially obscured by darkness or you may only be able to see their shadow or contour. In this circumstance, try concentrating on angles; the pictures will turn out significantly different from the typical wedding pictures. You’ll have the opportunity to show off your abilities and produce works of art with limited resources when working in the gloomy light.
4. Don’t Delete Any Images Immediately
You could be doing this out of habit or just because modern cameras enable you rapidly erase a picture if you don’t like it. But, this also implies that you could eliminate pictures that, while they might not appear to be works of art when taken, can definitely be improved upon in post-production. If you save them and review them later, you could discover some that Lightroom or Photoshop can correct.
5. Keep The Continuous Shooting Mode On
Using the continuous shooting option when photographing an indoor wedding might be beneficial. You’ll be able to capture more pictures more quickly and make sure that no important moments are missed. Occasionally, the picture you take immediately following the one you planned or staged could turn out better and catch the moment! Just make sure your focus is set and your shutter speed is fast enough to prevent blur in your pictures! Use a flashlight or another direct light source to briefly illuminate your subject in order to lock the focus if you are in a really dark environment.
6. Learn How To Bounce Flash & Diffuse Light
Knowing how to bounce a flash or disperse light may be quite useful in settings like churches where the lighting may be very dim. You can bounce flash if the church permits it, but keep in mind that doing so on a colorful surface could give your image a color cast. To soften the light, you may also use a flash diffuser. If using a flash is prohibited, you can use a fast lens with wide apertures and raise the ISO. For shooting indoor weddings, using a lens with image stabilization could also be beneficial. In any case, confirm that using flash or other lighting equipment within the venue is permitted.
7. Gel Your Flashes
Gelling your flashes entails utilizing a gadget to give a tint to the light coming from your off-camera light or flash by placing it on top of the light source. Your light source would match the ambient or any other available light if your flashes were gelled. This will enable you to make your subject’s skin appear more consistent and your photograph more aesthetically attractive by adjusting the impact of mixed lighting. At this stage, you may utilize your camera’s preset settings to match the light in the room to address white balance concerns. Try a custom white balance option in the camera if this doesn’t work for you. If there’s still a problem, you can correct it in post-production.
8. Get Creative With Silhouettes
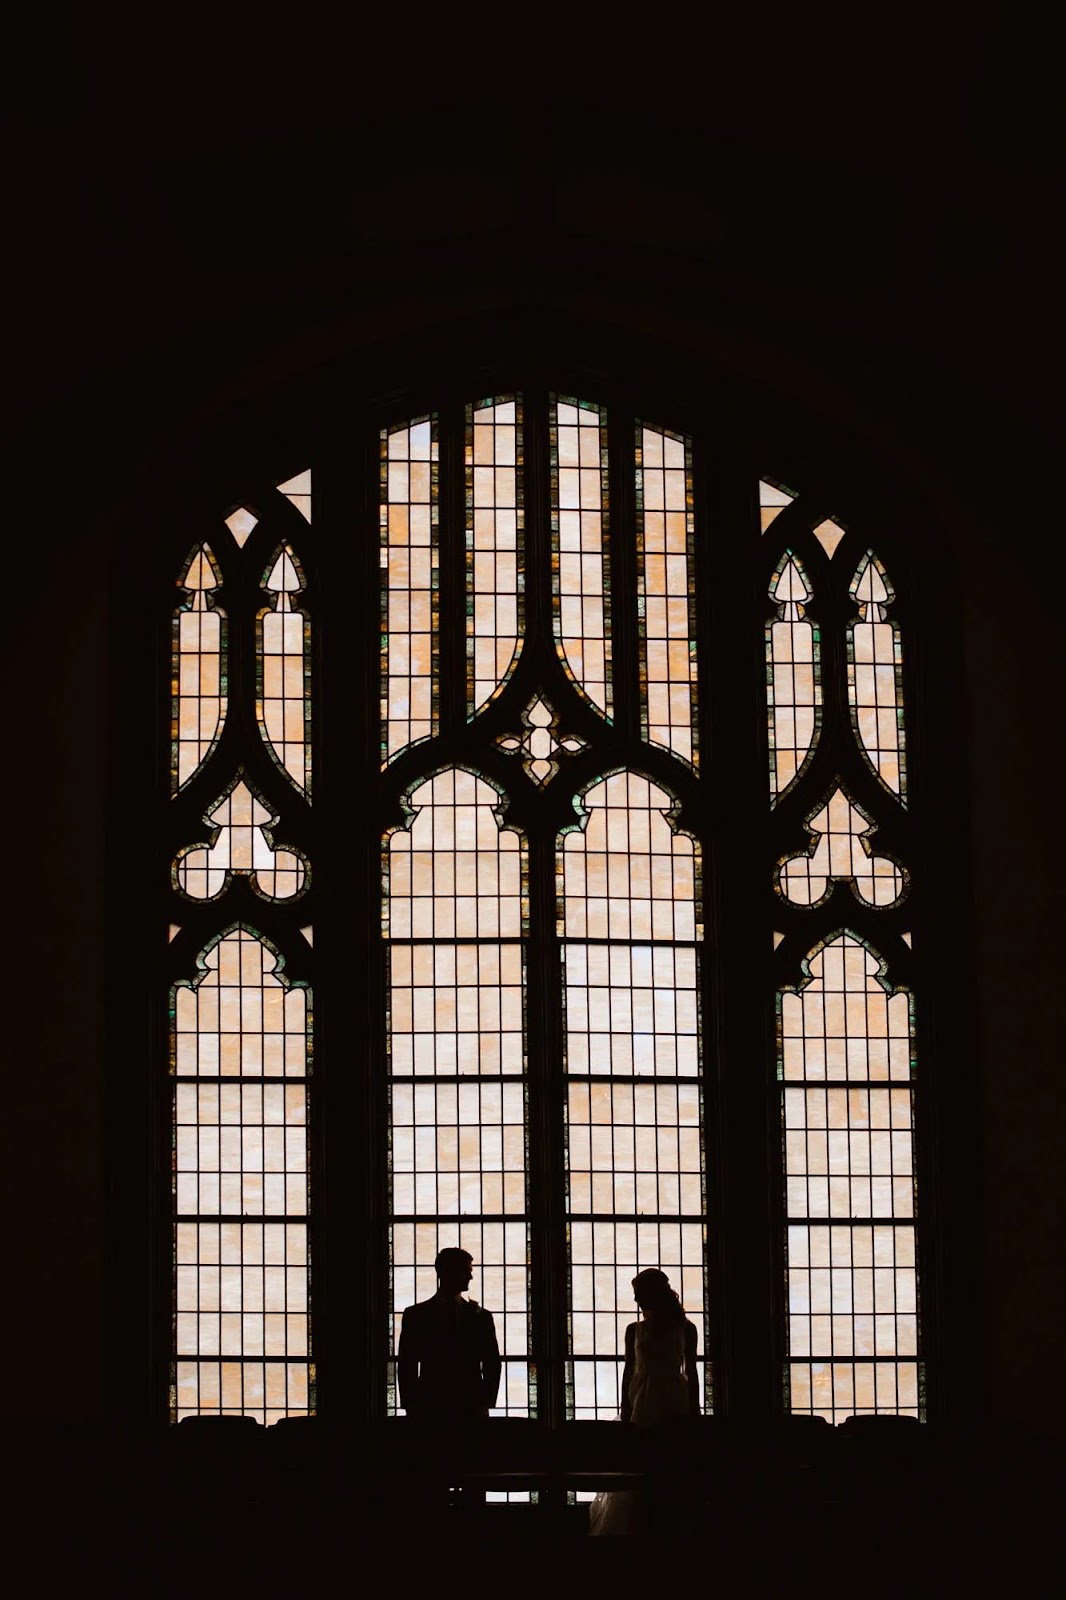
While photographing your couple indoors, use some creativity by using silhouette wedding photography to offer diversity. You may also create excitement and break up the monotony in your couple’s wedding photos by using a few high, low, wide-angle, or close-up views. You would need to photograph against the light and pay attention to outlines while making silhouettes.
9. Adjust Exposure
Adjust the exposure to capture the ambient light of the venue for indoor weddings. Adjusting your ISO, shutter speed, and aperture will help you get the right exposure since they all have an impact on how your camera perceives ambient light. Your settings will alter in proportion to ambient light mixed with flash if you are utilizing off-camera illumination or on-camera flash. If you correctly underexpose, you should be able to capture ambient light while allowing the off-camera or on-camera light to illuminate your subject. Before a wedding, try rehearsing this method indoors to avoid rushing to make it work that day.
10. Find and Use Window Light
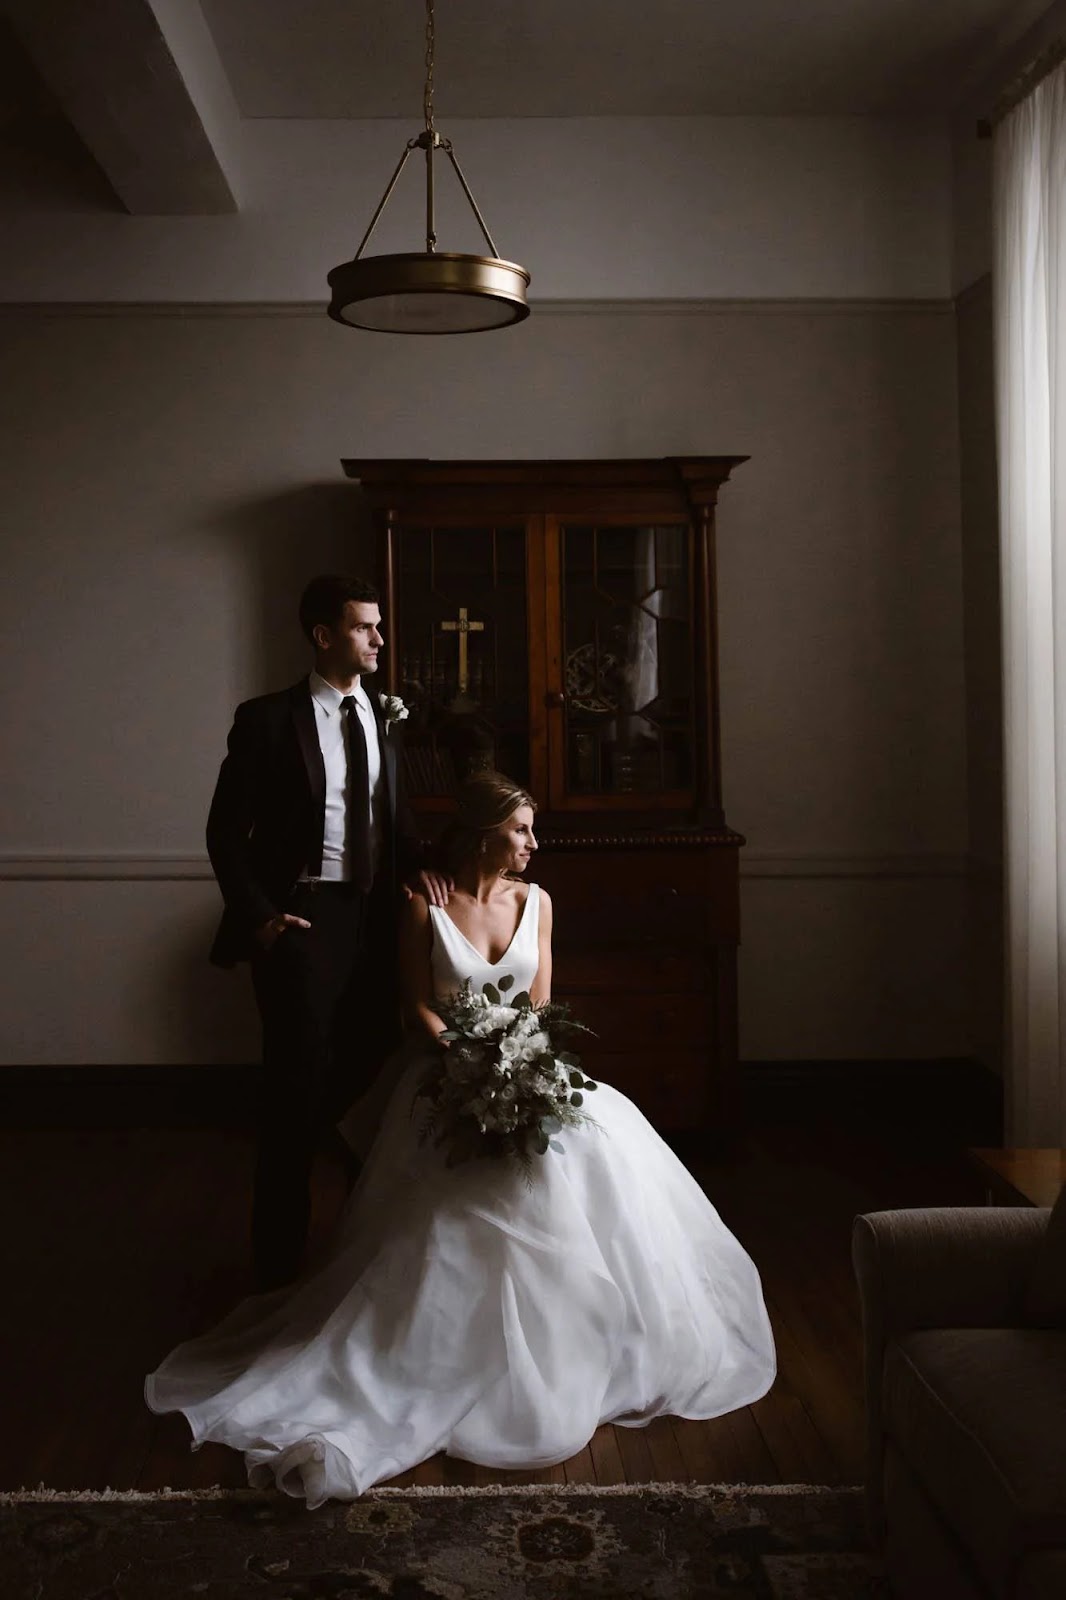
The secret to successful indoor wedding photography may be window light. Using window light to take beautiful wedding photographs is a possibility that is limitless. There is always something intriguing to construct around windows, whether you utilize them as a frame or as a source of natural light. You may use window light directly or soften it by covering it with a transparent cloth. In any case, the outcomes would be stunning for your relationship.
Be Well Prepared Before You Shoot Indoors
There is nothing that compares to the golden hour light while taking pictures outside, but you can take equally wonderful pictures indoors. You just need to be aware of all the necessary tips and methods. The next time you have to photograph a wedding inside, seek sources of natural light, bring your lighting equipment, and be extra ready. Making the most of the available lighting options is the key to capturing all the appropriate moments indoors. The aforementioned advice (together with your imagination) will help you take photographs even when the lighting isn’t optimum.
We at Shoot Dot Edit love to provide advice that can help you become a better wedding photographer and streamline your process. To ease your post-production strain, we also provide expert picture editing services. See our pricing plans to find out more about our offerings.