Many new photographers frequently ask what camera settings to use to obtain the greatest results with their available equipment. While there isn’t a single combination of camera settings that works well in every shooting circumstance, I have discovered a couple that I usually use. on any camera I use and that applies to all camera manufacturers now on the market. These are the original “basic” settings I make; once they are complete, I hardly ever go back to them. Also, there are specific camera modes that, especially for a beginner, make the process of taking pictures simpler or faster. Let’s examine these typical camera settings in further detail.

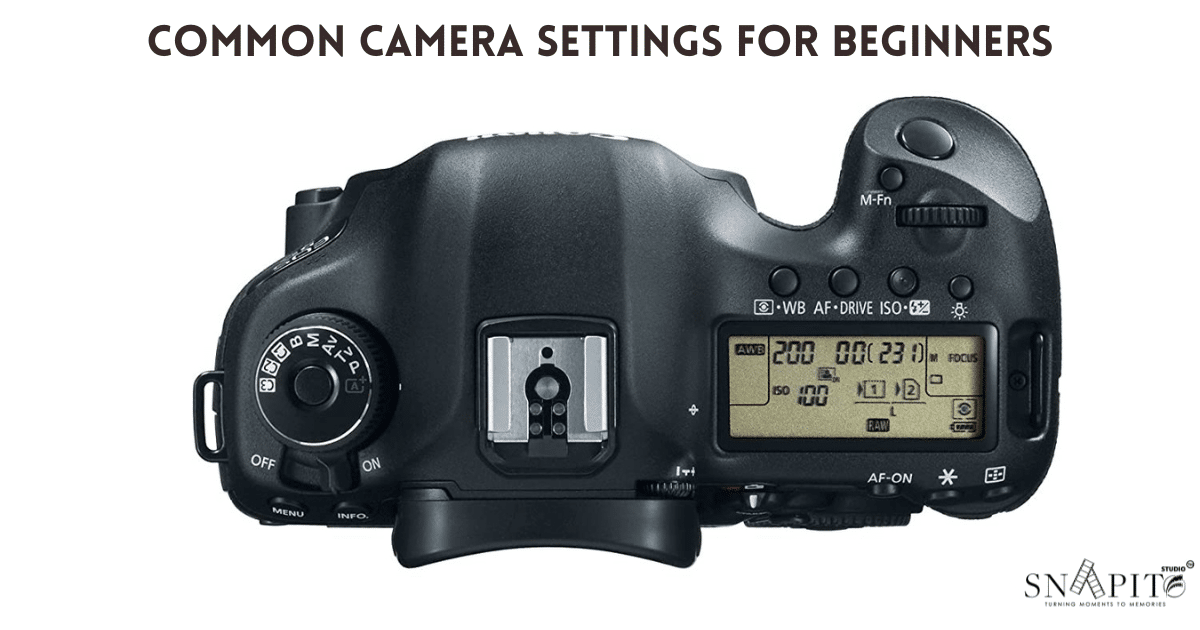
Camera Setup
Let’s start by going through basic camera settings that should apply to any contemporary digital camera. As the following settings are essentially the same for all brands and types of cameras, you should be able to discover them:
- RAW image quality
- RAW Recording: Compressed Lossless (if available)
- Auto White Balance
- The standard for picture control, picture style, creative style, and film simulation
- RGB color space
- Activating Long Exposure Noise Reduction
- Off for High ISO Noise Reduction
- Lens Corrections (Vignette Control, Chromatic Aberration Control, Distortion Control, etc.) Active D-Lighting / DRO, HDR: Off
The most crucial camera settings are those listed above. Always start by selecting RAW as the appropriate file format… Lossless Compressed should always be used when choosing RAW compression, as it uses less space than other options and is described here. Even though Picture Controls, for example, only affects how the image appears on your camera’s LCD when shooting in RAW, it is best to stick with a standard profile and should stay away from changing any other parameters, as they are only relevant when shooting in JPEG format. Examples of these settings are sharpening, contrast, saturation, etc.
You don’t need to bother about white balance or color space because they can be adjusted after the RAW shooting. Long exposure noise reduction does affect your RAW photographs when doing long exposures; it works by minimizing the amount of noise you will notice in your images. If you’re not an expert, I’d advise leaving it on (although it will also double the amount of time it normally takes to capture an image). The quality of your RAW images will not be improved by any further in-camera lens corrections, dynamic range improvements, or noise reduction settings, so you should turn those off as well.
It is time to move on to the aspects of capturing images that matter after you have the aforementioned settings configured on your camera.
Best Camera Shooting Mode
While some photographers contend that to have complete control over your camera, it is important to constantly shoot in manual mode, I would strongly disagree with that. Choose one of the semi-automated camera modes instead, as there is very little incentive to shoot in Manual Mode given how excellent current cameras have become at accurately metering a scene and exposing a subject.

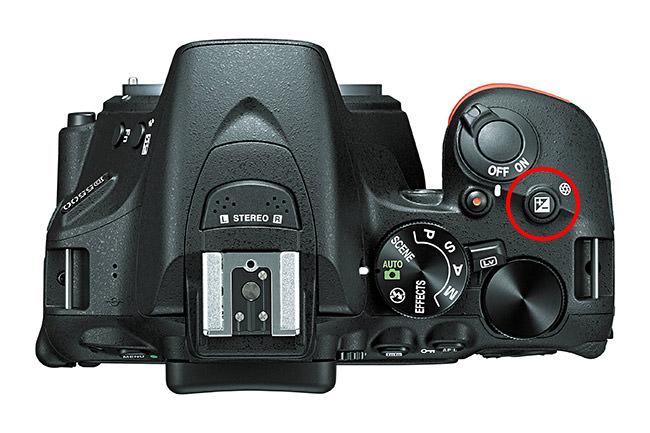
For instance, I use my camera’s Aperture Priority setting 90% of the time since it works well and gives me complete control over how bright or dark I want an image to be in addition to my camera’s aperture. Just adjust your exposure using the Exposure Compensation button if your camera captures a brighter-than-desired image:
If you’re unsure if it’s a good idea to utilize one of your camera’s “Scene” settings, such as Macro, Sports, Fireworks, etc., I would advise against doing so for a variety of reasons. The primary cause is that these settings change significantly not just between various camera manufacturers but also across models. You might not be able to locate the same scene mode on a different camera model if you become accustomed to using a certain scene mode on one camera and then decide to upgrade to a new one in the future. It’s also important to note that scene modes were never included in the majority of high-end and professional camera models.
Best Autofocus Mode
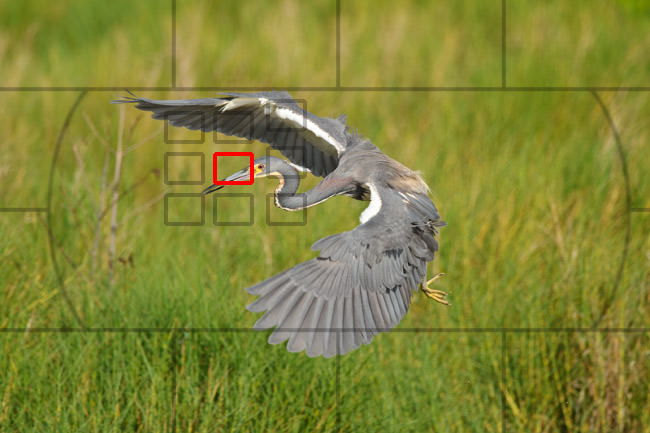
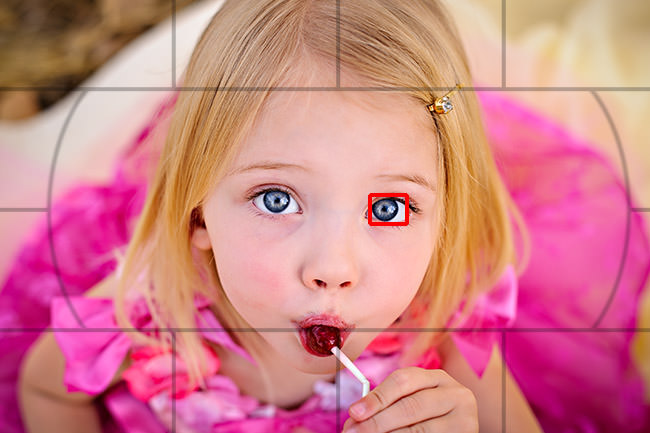
Regardless of what you are photographing, you should always make sure you are using the optimal focusing setting. In contrast, if your subject is continuously moving, you should switch to Continuous / AI Servo Focus Mode because you probably want your camera to actively track your subject. For example, if you are taking a picture of a still subject, you might want to use Single Area Focus Mode (also known as “Single Area AF,” “One Shot AF,” or simply “AF-S”).
Camera makers occasionally include a hybrid mode that, depending on whether your subject is motionless or moving, automatically shifts between Single Area Focus Mode and Continous / AI Servo Focus Mode. This is done to simplify things for beginners. This hybrid mode, which is referred to as “AF-A” on Nikon cameras and “AI Focus AF” on Canon cameras, may be useful if switching between AF-S and AF-C camera modes is difficult for you.
An “Auto AF” option is also available on certain cameras. In this mode, the camera scans the whole picture and tries to focus on either the closest target or a topic it deems significant. For the majority of novices, I would advise against utilizing such options since you can more precisely control where your camera focuses by changing your focus point to the appropriate location. To accomplish this, choose Single-Point AF-Area Mode, as described on the page on autofocus modes. You may either relocate the focus point to your topic or region of interest by moving it once you have one point in your viewfinder that you can move it to the focus point, or you can move your subject to the focus point:
Best Metering Mode
While your camera may offer a variety of metering modes, including spot metering, center-weighted metering, and matrix / evaluative metering, it is usually ideal to use matrix / evaluative metering by default since it considers the entire scene and normally exposes your subjects more accurately.

Best Lens Aperture
You must be careful about the aperture you choose in a particular setting since lens aperture not only influences how your subject is separated from the foreground and background but also determines how much light passes through your lens. The ideal aperture to choose depends on your topic and the lighting conditions where you are shooting because it may also affect aspects like image clarity and depth of focus. It is advisable to take pictures with the widest maximum aperture your lens can give if you are taking photos in low light and you want to prevent adding camera shaking to your shots while shooting hand-held. You may either relocate the focus point to your topic or region of interest by moving it once you have one point in your viewfinder that you can move. If you have a 35mm f/1.8 lens, for instance, you might wish to keep your aperture set at f/1.8 under certain circumstances. But, cutting down the aperture of your lens to something like f/5.6 will be ideal if you are standing at a picturesque overlook and you want to take a sharp picture of the entire countryside.

Aperture has a variety of purposes, but one of them is to influence how distinct your subject is from the backdrop. You can see how an image might seem different when taken at a wide aperture like f/2.8 compared to a tiny aperture like f/8.0 in the example above.
I urge you to study the articles in the links above to better understand the effects of aperture and what they may do to your pictures.
Best Shutter Speed
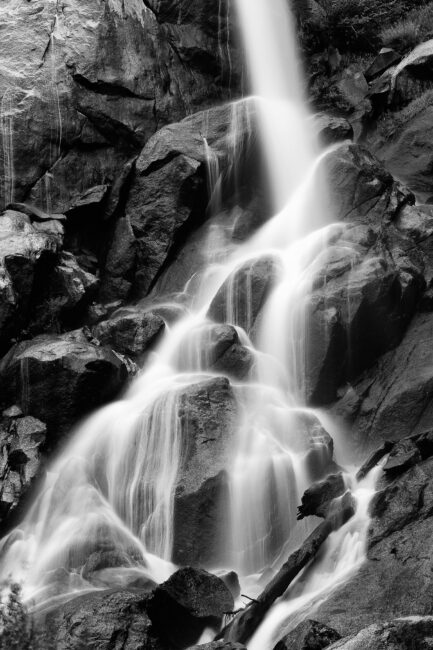
The ideal shutter speed will be determined, like the aperture, by the subject you want to capture. For instance, to make the flowing water look fuzzy in a dreamy shot of a waterfall, you will need to utilize a slow shutter speed that may last many seconds:
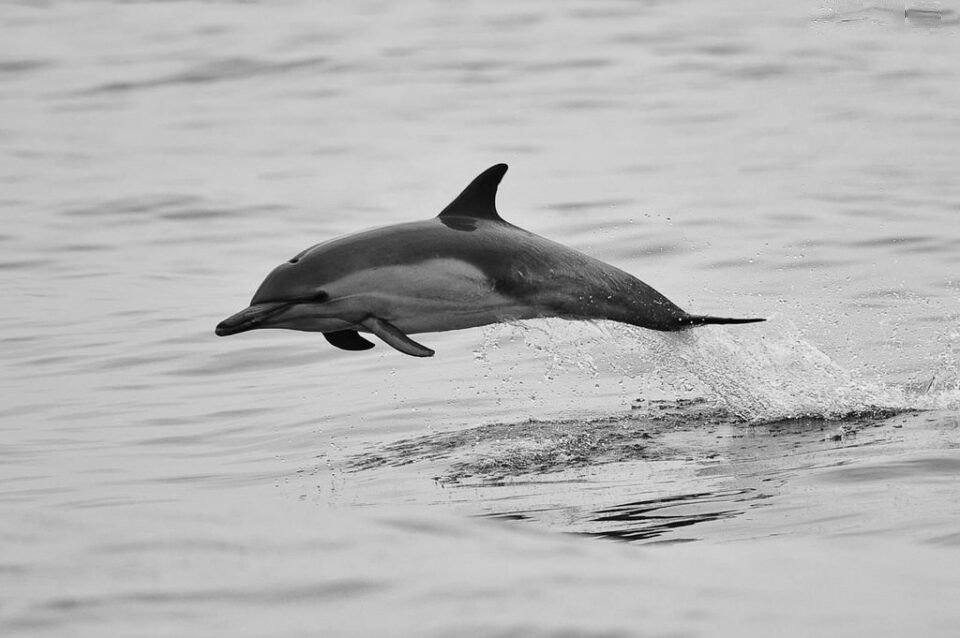
But you must utilize extremely fast shutter speeds that are just a tiny fraction of a second if you wish to freeze a subject in your scene:
Nonetheless, in the majority of cases, it is preferable to choose shutter speeds that are quick enough to prevent camera shake from interfering with the collection of photos. As a result, I advise reading our article on the reciprocal rule and activating Auto ISO (more on ISO and Auto ISO below).
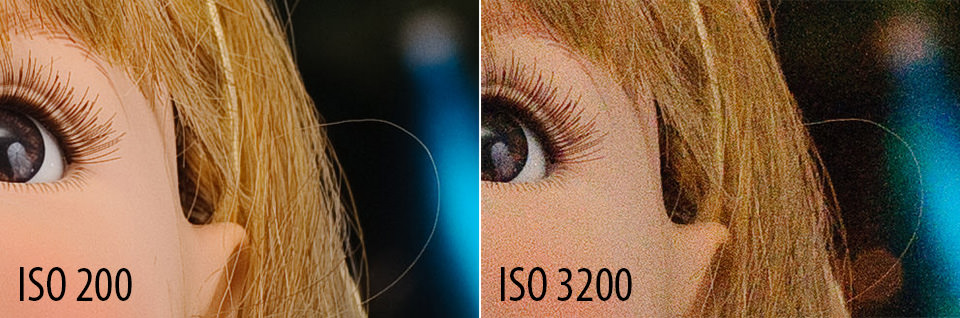
Best ISO Setting
The lowest ISO setting on your camera is usually preferable since it results in the least amount of noise and grain in your photos. The last thing you want is for your ISO to be set too high and make every image appear too noisy. Even while noise cancellation methods could be useful, it is preferable to stay away from noise altogether.
Unfortunately, it’s not always practicable to shoot at the lowest ISO, especially when shooting in dimly lit areas. Under certain circumstances, you will need to raise your camera’s ISO to maintain a fast enough shutter speed to prevent blur from inadvertent camera shake.
When taking pictures, always preserve the Exposure Triangle, sometimes referred to as a harmony between Aperture, Shutter Speed, and ISO. I think you should spend some time knowing how the three work and how they relate to one another.
Auto ISO
A function called Auto ISO, which is most likely included in current digital cameras, maybe a very useful tool for a newbie photographer. After Auto ISO is turned on, your camera will automatically modify its ISO based on how bright your subject and the surrounding area are, attempting to maintain a shutter speed that is at least as fast as the minimum shutter speed you specified in the Auto ISO menu. In her excellent essay Understanding Auto ISO for Beginners, Elizabeth Gray assembled example Auto ISO menus from a few different cameras for our readers.

Advanced Auto ISO settings on certain cameras from Nikon, Canon, and other producers can take into account the reciprocal rule and permit an “Auto” configuration for minimum shutter speed, which will take into account the focal length of the lens being used. For novices, these features may be quite helpful since they spare them from having to repeatedly change the camera’s settings.
Image Stabilization
Last but not least, don’t forget to use any image stabilization features that are provided by your camera (in-body image stabilization) or your lenses, such as SteadyShot, Vibration Reduction, or Vibration Compensation. Remember to switch it on while using a hand-held camera and off when using a steady tripod. Also, before snapping a photo, it is usually a good idea to half-press the shutter release for a few seconds to allow your camera or lens to stabilize. There will be a reduced chance of blurry photos as a consequence.