It’s no wonder that food photography is a popular subgenre of photography; it’s an excellent method to convey the beauty and flavor of food. But it’s not as simple as it seems to take excellent food pictures. A wonderful technique to enhance your mouthwatering food shots is to experiment with different food photography perspectives.
Why is It Important To Use Various Angles When Photographing Food?
Your food photography can succeed or fail to depend on a variety of reasons, including problems with the lighting, composition, or style of the food and props. A subtle “odd” feeling in a picture might result from even small choices in these areas.
When composing for food photography, camera angles are crucial. A viewpoint that may be excellent for one photograph may not be ideal for another. Therefore, consider which angle will assist highlight the dish’s greatest aspects before you grab your camera.
The three primary perspectives for food photography are straight on, 3/4, and above.
They could appear a little technical. But it’s not difficult to memorize these camera angles. Similar to a bird’s eye perspective above. You might consider the 3/4 as the diner’s perspective in the meantime. Finally, straight-on describes a shot when the camera is parallel to the table.
There are small differences between these camera angles for food photography. But these are the primary ones that experts and fans consistently employ.
How To Use The 3/4 Camera Angle
When your camera is positioned between 25 and 75 degrees from your subject, you are using this angle.
The most typical angle for commercial food photography is 45 degrees. Due to its versatility, it is a common angle. It enables you to display the dish’s front, surface, and sides.
Did we also mention that when individuals eat food, they perceive the world from the same perspective?
A variant of the 45-degree angle is the 30-degree angle. Viewers can see the backdrop thanks to the camera’s significantly lower perspective.
Let’s have a look at the photos of food below to discover how the 3/4 perspective works. The left image was taken at a 30-degree angle, while the right image was taken at a 45-degree angle. The backdrop is seen in the left photograph. However, the components in the cuisine are much easier to see in the picture on the right.
The focal length was the same in each of these pictures because they were both taken at 70mm. The camera angle was the cause of the variations.
Consider the type of dish you’ll be presenting a meal in mind as you choose the angle for food photography. We would be interested in learning more about a salad that was served in a bowl. In this case, a 45-degree angle is preferred over a 30-degree one.
Before you begin setting up your photo, choose your camera and your props since one will have an impact on the other. It also depends on the lens you choose and the separation between the subject and your camera.
When using a longer lens, all that is usually visible is the food and the table. I virtually usually use my full-frame camera with a focal length of 70mm or more.
A wide-angle lens has a 50mm focal length for food photography. If you are only shooting one dish, the background may be visible more than you would want.
You’ll need broad surfaces and backdrops for images taken with a 50mm lens. You’ll also need to go rather near to your food if you want to omit anything from the photograph. You’ll take up a lot of needless space if you don’t.
If you are making a tablescape or have extra dishes or accessories in your picture, the 50mm is a terrific lens to use.
I think 50mm is too constrained for photographing only one dish or simple food photography. Even though there are other objects in the frame, the meal must be the main subject of the shot while taking it. These need to enhance rather than detract from the main point.
How To Use The Overhead Camera Angle
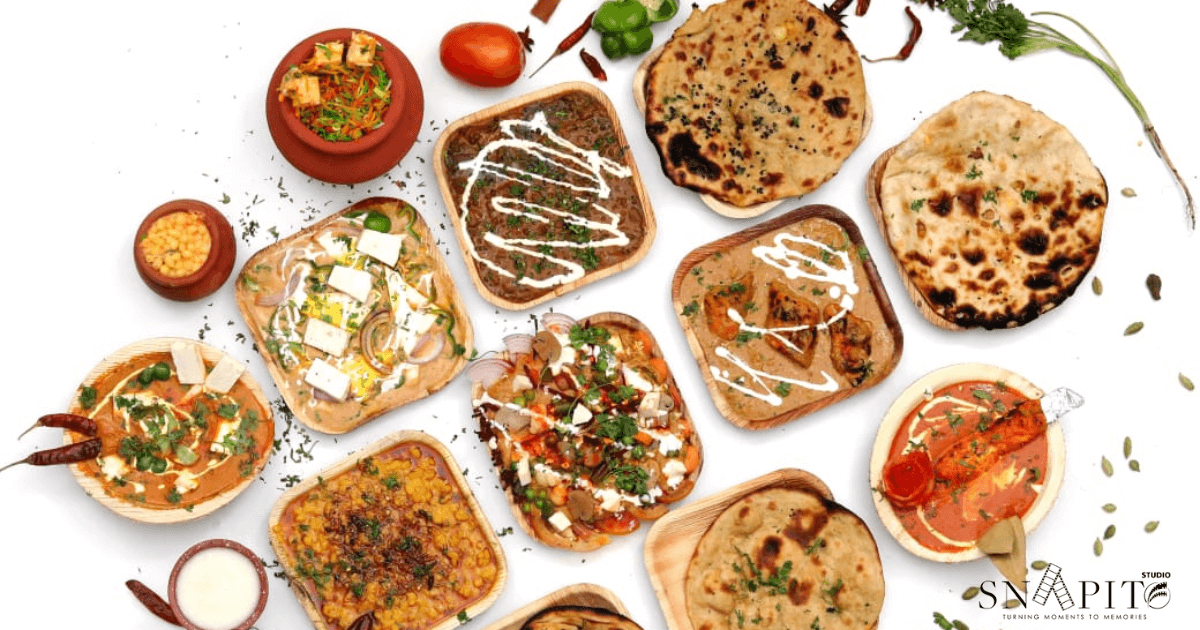
The above image has recently become one of the most well-liked camera perspectives, thanks to Instagram. The wide-angle lens on smartphones makes it ideal for smartphone photography. So this is one of the greatest perspectives to attempt if you’re an aspiring food photographer!
Due to the distortion brought on by a wide-angle lens, food photographed at a 45-degree angle with a smartphone may appear to be slipping off the table.
The overhead provides several advantages. For instance, it helps arrange a setting with multiple parts, like a tablescape. It makes for a great narrative because of this. When you photograph from above, a variety of accessories, ingredients, or food plates will appear in the picture. Additionally, employing this angle to construct your photo is frequently more practical than a 3/4 or straight-on.
The 90-degree tilt in the spaghetti carbonara photo below lets us look within the plate. It demonstrates small elements like the bacon, parsley, cheese that has been grated, and freshly ground black pepper. Even though the image is basic and has a lot of white space, it looks good.
Not just the meal, but even the pan and the background are quite textural.
The use of texture is crucial in food photography, and choosing the above position lets us make the most of it.
The above perspective doesn’t, however, work for all food shots. It does away with depth, giving a picture a more visual pop. Therefore, it cannot be used with all types of food. You highlight the contour of the meal and numerous scene features with the overhead viewpoint.
How To Use The Straight-On Angle
For “tall” dishes, such as burgers or stacks of pancakes, this camera position works well. It draws attention to a dish’s height. The bun or top slice of bread conceals the contents of burgers and sandwiches when you are photographing them. Because of this, it makes no sense to take the image from a location above the meal. Never forget that the goal is to highlight the food’s greatest qualities.
Straight-on was the obvious decision in the photograph of the Eton Mess below. It enables us to observe how the fig and blood orange segments are piled with meringue and whipping cream. We can see the texture of the chocolate brownies and the cherries in the picture. And then there is the contrast of the icing sugar sprinkling.
The icing sugar and the brownie’s top texture would have been the main subjects of the photograph if I had taken it from above. And that’s horrible because then there would be no way for people to find out what was in their food.
Other Great Angles You Can Use in Food Photography
There are more angles than the 3/4, above, and straight on, as we already discussed. You may also use the following ones when photographing food:
Low Angle
A variant of the straight-on view is the low angle. The only difference is that you must approach the dish you are shooting from a little lower than normal.
The dish appears larger than it is from this angle. Due to this, it frequently appears in ads. When photographing burgers, a stack of pancakes, or anything else tall, utilize it.
Close-Up
Is it necessary to list the food’s ingredients? Then think about taking a close-up picture. You may use it to demonstrate the dish’s texture and finer details.
Your audience will have a better understanding of how the food will taste and feel in their mouths if you do it this way. Most of the time, this viewpoint serves just to enhance the main photograph. In other words, you should use the main shot to establish what people are looking at. They will thus recognize the topic when they see the close-up.
Dutch Angle
A Dutch angle is merely another way of saying to tilt your camera. It doesn’t happen often in food photography. However, if your set contains straight lines or geometric shapes, you may attempt this.
To add some interest, you can slightly skew things rather than having them all perfectly straight. In turn, the diagonal shapes you make aid in drawing attention to the meal.
When Should You Use These Angles?
Always put the food you are photographing first. Is it sandwich-like in that it has layers? Or is it a dish that is flat, like pizza? Consider where you want to position the primary point of interest as well. You should concentrate on the food front, in my opinion.
You should stay away from overhead pictures if the meal has layers. Choose the 3/4 and straight-on angle instead. You may display everything in it in this manner.
Do overhead shots if the dish is flat or has the majority of its components at the top.
Use the overhead or straight-on viewpoint while taking a photo with your phone. Avoid adopting a tilted position. When beginning to shoot food photography, there is a propensity to capture photographs at an angle. It never looks nice and will make you appear unprofessional. especially if it appears as though the meal could spill!
Don’t restrict yourself to one perspective while capturing images of food. You should attempt all three angles. After all, the majority of seasoned photographers work in that manner. To not overlook anything, they aim to cover everything. They can offer their clientele more options because of this way of thinking.
Of course, you have to think about attempting other viewpoints. By doing this, you may develop a distinctive viewpoint. You see, the more distinctive your photographs are from those of competitors, the better your chances of success in this field are. So don’t be reluctant to try new things! Because your topic is stationary, you have plenty of time to do so.
Conclusion
You will benefit greatly from knowing how to employ 3/4, overhead, and straight-on in product photography. You won’t have to waste time thinking about how to photograph your meal once you are familiar with these perspectives. There are only three options available to you, after all.
It will become more intuitive as you practice and take more photos of food. You’ll have the ability to swiftly select the angle that will work best for the subjects you are shooting. Although making plans in advance might be useful, you should also leave space for innovation.