
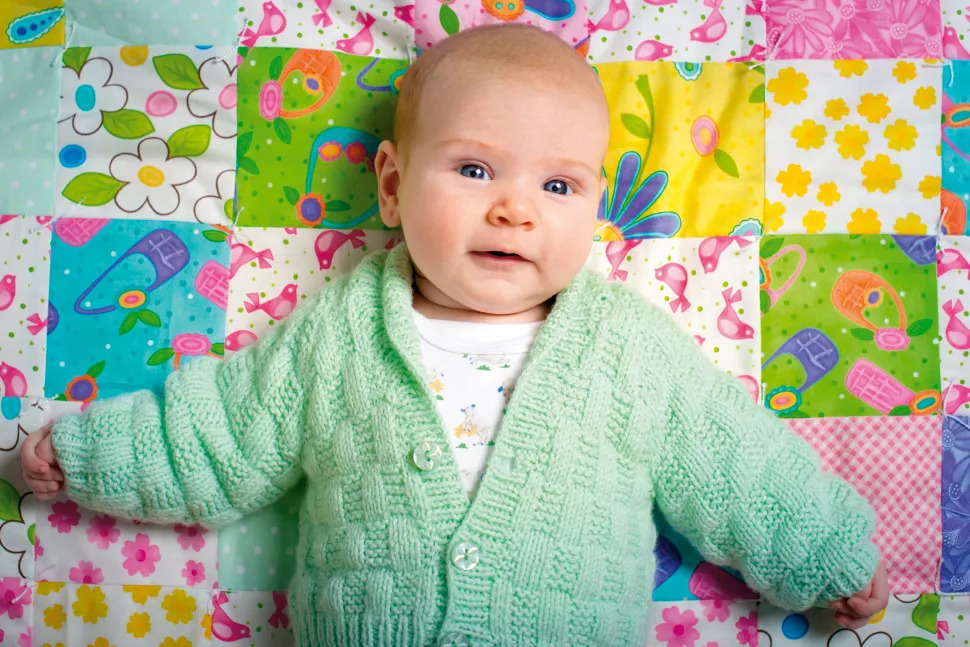
combining window light and bokeh that is as gentle as the subject to take infant photographs
The majority of parents desire stunning photographs of their infants, and one technique to achieve this is to utilize a narrow depth of field to create a lot of background blur, highlighting the subject’s softness and fragility.
Here, a prime lens with a large maximum aperture, such as a 50mm f/1.4, is useful. With a narrow depth of field and a wide aperture, we can capture details while blurring background objects. Wide apertures also allow us to work in lower light, making them ideal for portraits that are lighted by a window where the light level might be rather low.
There are only really three options: ask the parents to hold them, try laying them on their tummies, or lay them on their backs. The shoot’s constraints might be a gift since they make you concentrate on getting the photos just right while utilizing the resources at hand.
It is beneficial to be well-prepared. Bring some throw rugs and pillows with you to the session; infants enjoy the way they feel against their skin and they add texture to the pictures.
One infant may appear to be extremely similar to another from a distance (but don’t tell the parents that! ), so try to find methods to give the photos some personality. You can use a blanket or a beloved toy. Ask the parents if they have any extra clothing. Hats are very useful because they frame the face and provide color.
When photographing with window light, which lights one side of the subject more than the other, a reflector comes in handy. The reflector, which is placed across from the window, lifts the shadows by reflecting part of the light back at the object. While sometimes fairly modest, the consequences are crucial for professional outcomes.
While taking pictures of newborns, you never know what you’re going to get. They could be a blend of pleased, unhappy, drowsy, hungry, and other emotions. You must be prepared to modify your strategy. It’s a given that you’ll have to move rapidly!
Baby Portraits: Step By Step
In many aspects, windows function similarly to softboxes: the more intense the light is, the nearer the subject is to the light source. It should be somewhat soft unless sunlight is shining straight through the window onto the infant (which will likely result in a lot of grizzling and eye-scratching). You’ll need to move the infant closer to the window or further away from it to change the amount of light.
1 Soft Options
To the shoot, bring both bright and dark blankets. You may choose from a variety of backgrounds, and newborns prefer the feel of soft textures or fur on their skin. Utilize the baby’s special blankets, clothing, and toys as props. Your portraits will benefit from their addition of color, and any patterns in a photo with a narrow depth of field will blur wonderfully.
2 Position The Baby

The catchlights in the eyes in an image might be used to identify the location of the window. Make sure the light is coming from above, not below, and focus on the top of the head, the cheekbones, and the tip of the nose rather than the chin and the nose. As our eyes are accustomed to seeing light coming from above, this is a more natural angle for light.
3 Select Aperture Priority
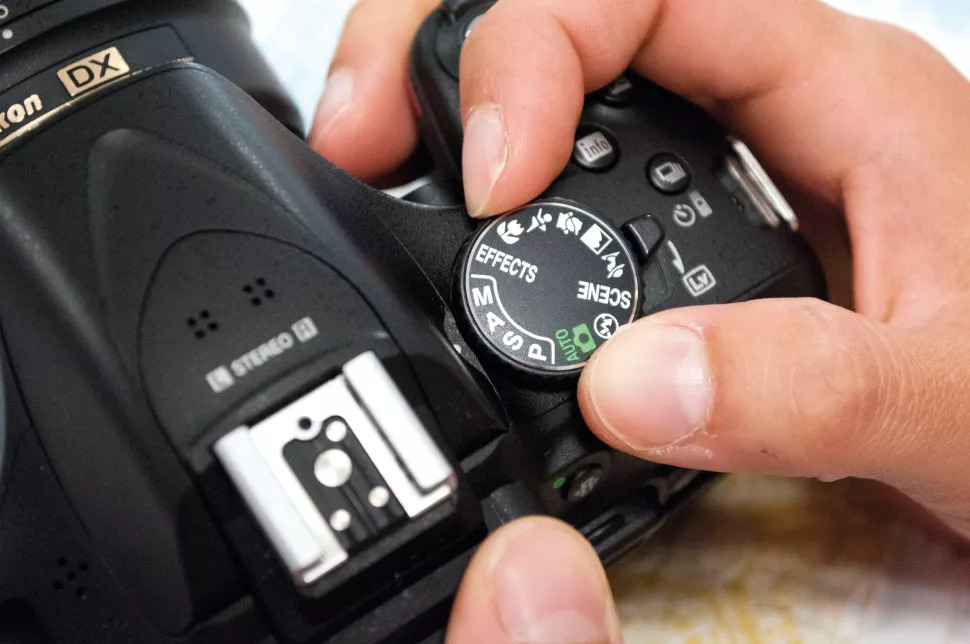
Put the aperture priority setting on your camera. In this manner, you can select the aperture as the camera determines the ideal shutter speed for a nice exposure. As a result, you have complete control over the depth of field in the image and can choose to gently narrow the aperture if you feel there is a bit too much blur.
4 Choose A Wide Aperture
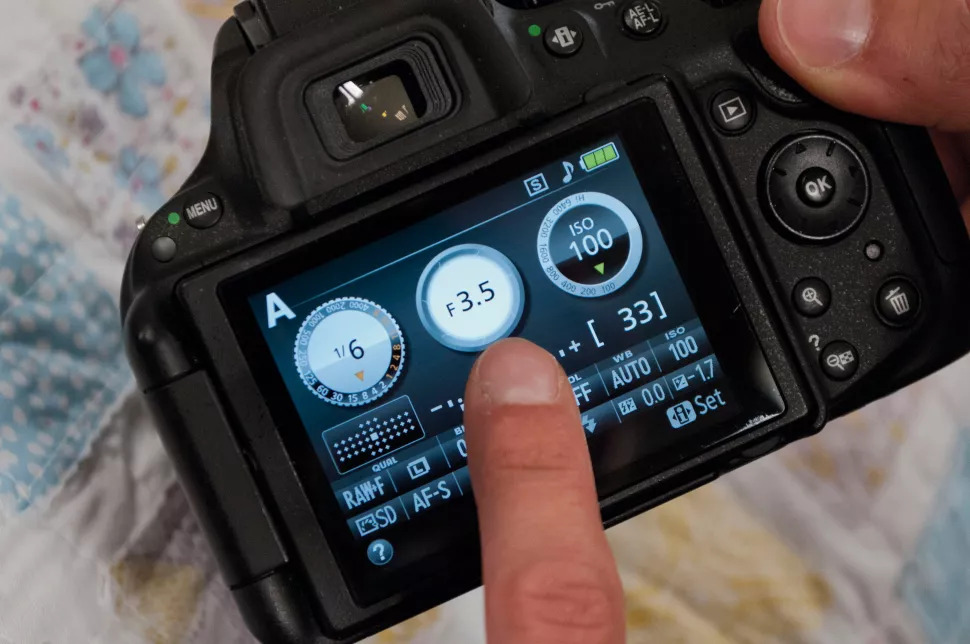
Select the highest aperture on your lens to take advantage of low light conditions and an extremely small depth of field. It is at this point when prime lenses with large maximum apertures, such as f/1.4 or f/1.8, excel because the smaller the depth of field in your photographs, the wider the aperture you can employ.
5. Set A High ISO
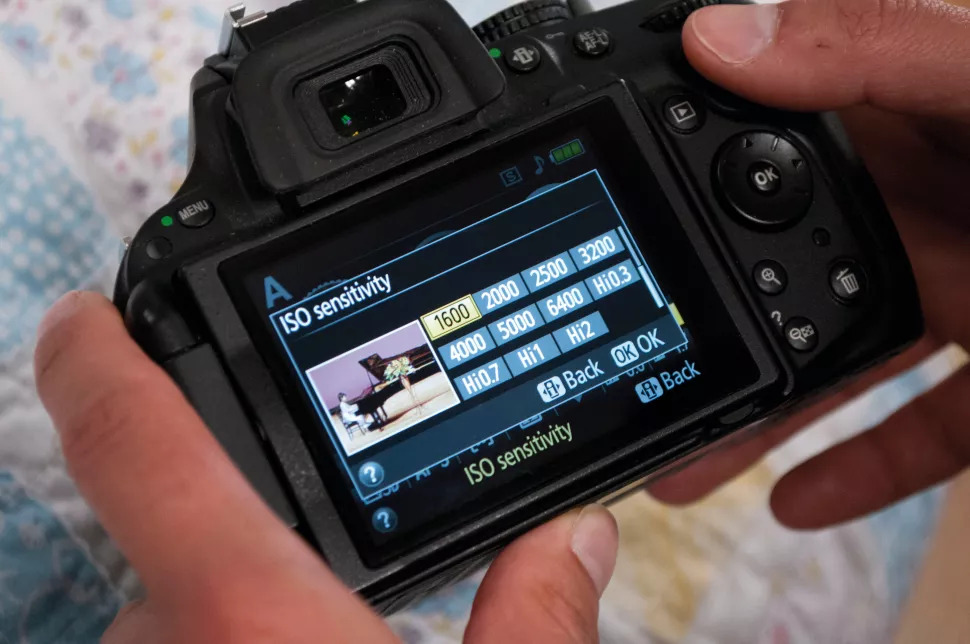
You’ll be taking handheld photos because the infant can’t be asked to pose, so set the ISO high enough to support a quick shutter speed of at least 1/100 second. ISO400 should be sufficient with window light and a large aperture, but you may need to increase it to ISO800 or 1600. (or set Auto ISO).
6 Focus Precisely
The eyes are the most crucial feature, as is typically the case with portraiture. But, in some of the photographs, you might be inventive and concentrate on the tips of tiny fingers instead, possibly using the parent’s fingers to provide a sense of scale and letting the rest of the infant fade into a delicate blur. But, move swiftly since infants can’t hold still for too long.
7. Time To Reflect
When you want to reflect window light onto your subject, a fold-out reflector comes in particularly handy. The greatest reflectors for photography come in a variety of sizes and shapes, and most have matte or silvered surfaces to alter the light’s appearance.
You don’t have to run out and get a reflector right now for this project, though, if you’re not planning to use one frequently. A piece of white card will reflect light toward the infant, eliminating harsh shadows and lowering contrast. You may even coat the card with foil for a more reflecting effect.
Presenting Your Portraits
Proud parents will likely have baby pictures on display for decades. Consider carefully how they will seem on display. Your pictures can shine when presented in a unique way or with another presenting technique.
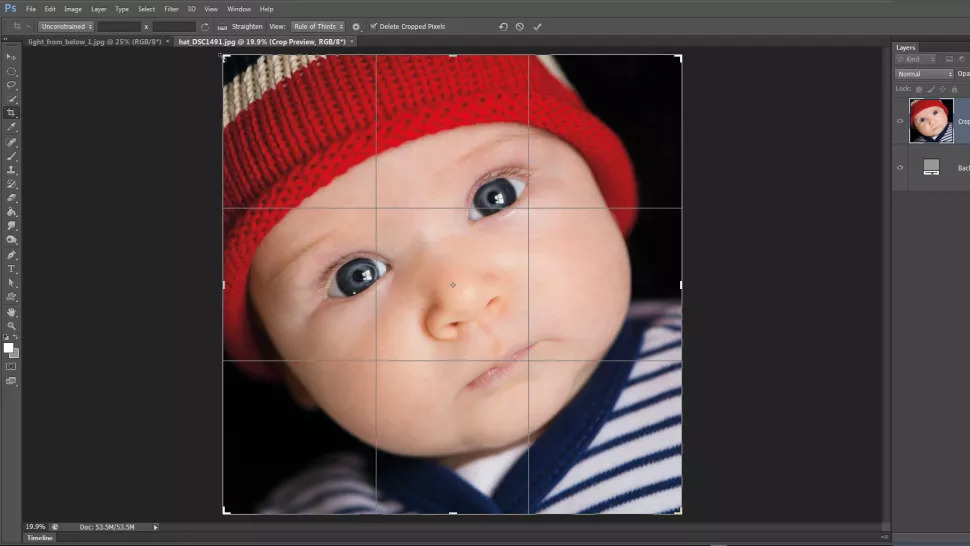
Crop To Square
A square crop enables you to get incredibly close to the baby’s face and gives your photographs a timeless feel.

Convert To Mono
For a punchy monochrome conversion, use Camera Raw’s HSL Panel or Lightroom’s Black and White presets.
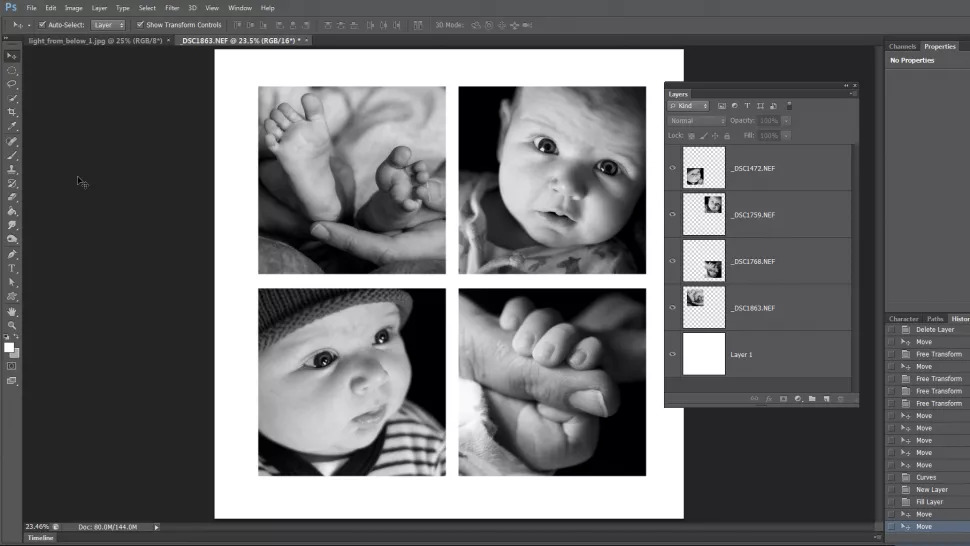
Compile A Grid
When arranged in a grid, close-ups and detailed pictures may appear stunning. To see how the photographs will group, crop each image to the same size and arrange it in Photoshop.